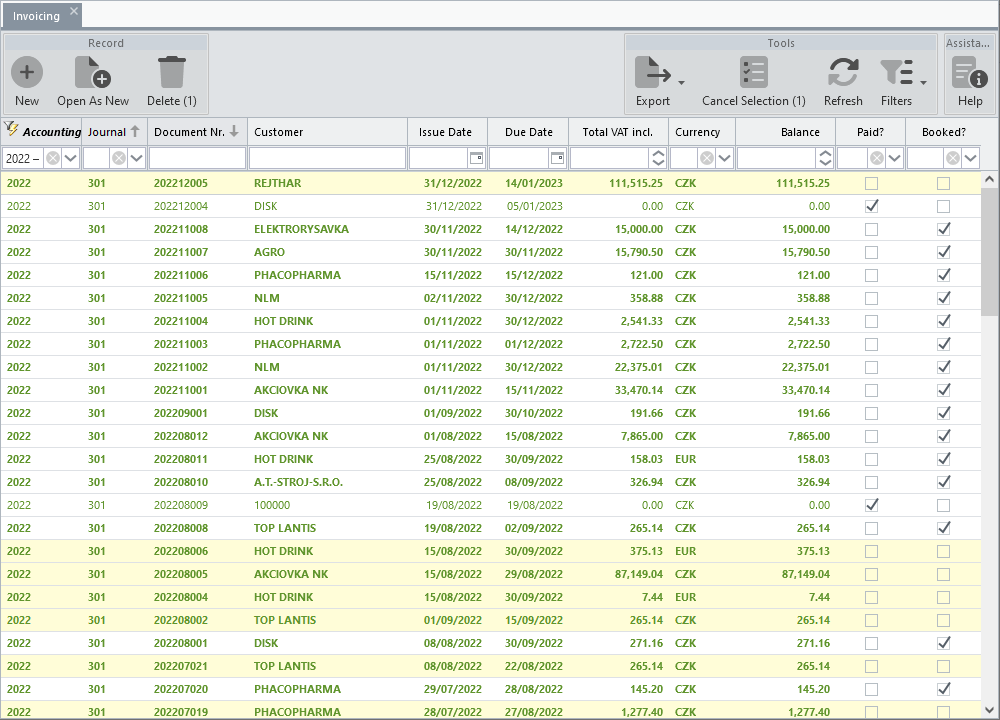
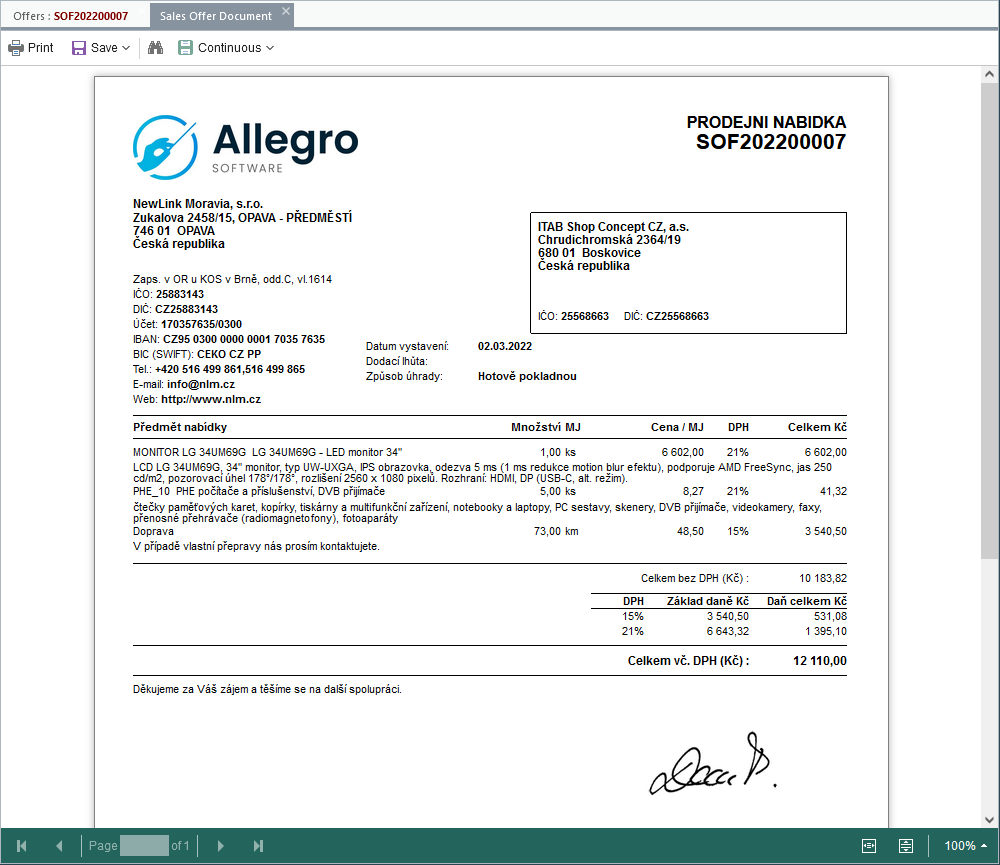
Application for issuing invoices, which can be created by opening a blank form and entering the necessary data or simply created from offers. When launched from the menu, a list of invoices registered in the selected accounting period is first offered, lines that are not paid or not accounted for, or both, are highlighted in colour.
Once an invoice is saved, the Customer field cannot be changed.
When an invoice is posted, only selected data (e.g. description or amount paid) can be edited. The form is set up in the same way even if the document falls into a different accounting period than the one selected.
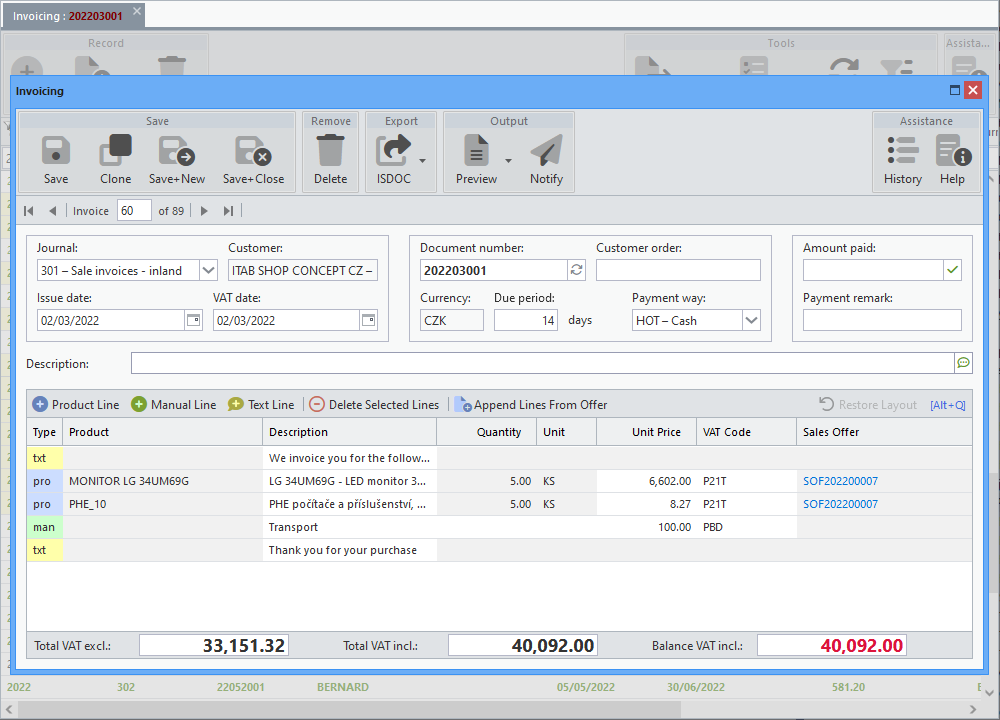
When a new invoice is opened, following fields are automatically pre-filled: Journal (the list of options is fixed and cannot be extended or edited), Issue date and VAT date (the date according to which the VAT declaration will be governed is mandatory data for invoices of VAT payers). Both dates are the same (but can be changed) and in the case that working accounting period is other than the current one, they are equal to the last day of the year of the period set by the user. Otherwise, in both cases, the current date (today) is filled in.
Additionally, the new invoice is assigned a Document number in a continuous number series. In case of a possible conflict with an already existing number (an invoice with this number has already been saved on another form or by someone else), a new number can be generated using the  button. At the same time, the data for Currency and Payment way is loaded according to the Subito settings. Since only one currency can be invoiced in Subito, the Currency input field is read-only.
The Due period input field is filled with zero days. The data is used to automatically calculate the invoice due date. After selecting a customer, this field is updated with the value set for that customer. If the due period is not set for the customer, the value according to the Due date category in default settings is used.
A record cannot be saved unless at least one line has been appended to the invoice.
Other Input Data
The Customer order data offers the possibility of registering the document number in the customer's internal records on the basis of which the invoice is issued.
After clicking on the  icon, the Amount paid input field is filled with the total balance of the invoice. If the invoice is only partially paid, the amount received can be entered.
A Description is only internal data and is not transferred to the invoice printout. By clicking on the  icon you can insert text saved for sharing and reuse (more about this component in a separate manual - chapter Components).
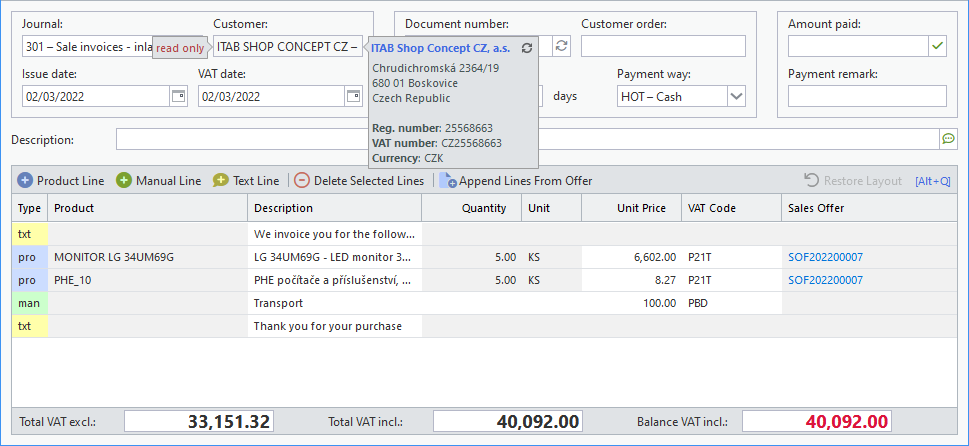
After opening the form for a new invoice, the cursor is automatically set to the Customer input field. The down arrow will offer a list of them, by entering any string of characters, all customers whose initial letters of the code or description match the entry are automatically searched and listed. Use the up and down arrows to scroll through the list, and confirm with the Enter key to enter the selected customer in the input field. The Esc key closes the list.
The customer input component also offers additional options:
|
Creation of a new customer. This will open the form to insert a new record. After saving it, it will be automatically added to the list and filled in the input field. |
|
Editing the selected customer. The form with the loaded record will open. If a change to the values displayed in the customer list is saved, it is automatically updated into the input field. |
|
Advanced search. A window opens with the possibility to filter customers by code, name, address, VAT number and many other data. After clicking on the listing line, the selected customer is entered in the input field. |
Invoice Lines
After filling in the document header, you can proceed to add the item lines. These can be of three types:
Product |
Selection of a product from the list of registered records, after which the values for Description, Unit, Unit Price and VAT Code are automatically loaded (the last two only if the these data are defined for the product). The cursor moves to the Quantity entry, where the value 1 is pre-filled. All data loaded in this way, except for the measure unit, can be changed by double-clicking on the given field. In addition, the component offers the same options as described above for the Customer input field. |
Manual |
If for any reason the item is not registered in the product database and therefore the product line cannot be used, this is an option to manually enter all values on the line (except for the product code). A Description can also be inserted from predefined texts in the same way as described above (icon |
Text |
An opportunity to insert any additional information, message or visual separator (e.g. underscore). |
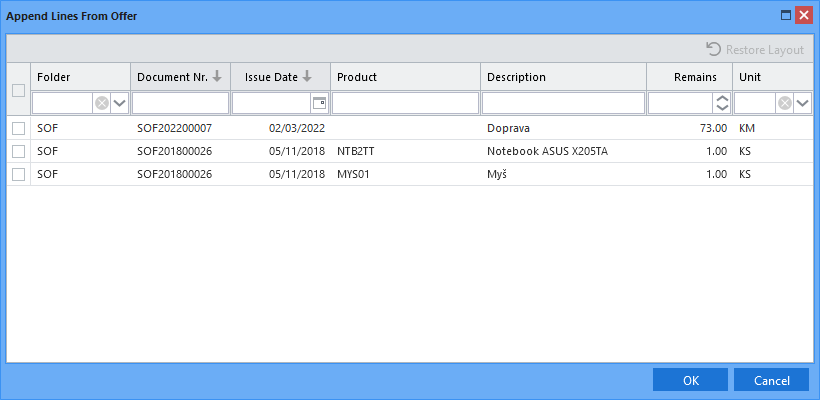
If Subito offers are used, the lines can be loaded from the offers issued for the selected customer (text lines are not included in this case). Lines are offered by clicking the Append Lines From Offer button, the list displayed contains lines from unsatisfied or partially satisfied offers from all accounting periods.
If the invoice line is loaded from the offer, the document number is listed in the Sales Offer column. Clicking on the document number opens the detail of the source offer in a separate tab.
You can move individual invoice lines with the mouse to change their order.
The price summary of the invoice is displayed in the bottom bar.
If the width of the columns in the line table is changed or they are moved to another position, the Restore Layout button becomes available, which can be used to return the table to its original arrangement.
The Alt-Q keyboard shortcut transfers control from the document header to the line table. The arrow keys can then be used to select the required row and column and the Enter key to start editing. Pressing Enter again confirms the change and Esc cancels it.
Toolbar
The standard tools are complemented by buttons included in the Export and Output group. For more information about the standard toolbar, see the separate manual - chapter Toolbar.

Generating and downloading a file in the ISDOC format, which always contains one electronic invoice document in XML format. The local button menu also offers export in the ISDOCX format, which is essentially a compressed ZIP archive, which, in addition to the electronic document itself (standard ISDOC), can also contain other files of any format (typically an invoice in PDF format, which is also the case with Subito).

A preview of the generated PDF file opens in a separate tab with the option of printing, saving in various formats or searching. Information about the owner is printed in the document header by default, but the local button menu allows to move the printing of this information to the footer.

Open the window for sending the invoice by email. The text is generated based on the definition in the customer's language in Subito defaults. Attached is an invoice in PDF format together with ISDOC file and also the terms and conditions, again according to the specification in default settings.
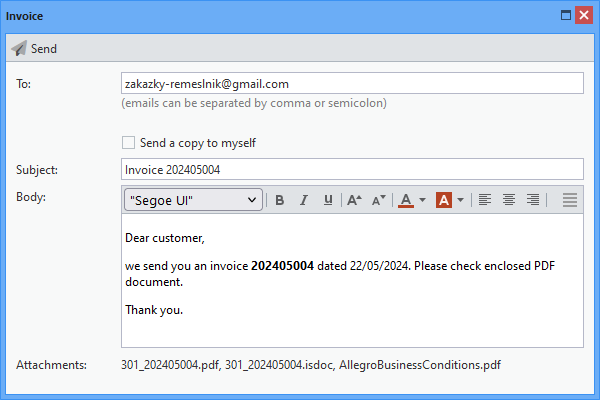
Sending an invoice by email
